
1
Traditionally when creating an effect that is meant to imitate a real-life object I round up a piece of reference and then try to replicate the object as closely as possible. Because of the nature of the 35mm negative however, it becomes necessary to deviate from reality to create an effect that is both pleasing to the eye and graphically convincing. This technique is commonly used to showcase images, but inverting the colors and tones to create a true negative would kill the appeal (unless of course you wanted the images to be nearly abstract). So technically speaking this tutorial would be replicating a strip of 35mm slide film which has been processed but not yet mounted.
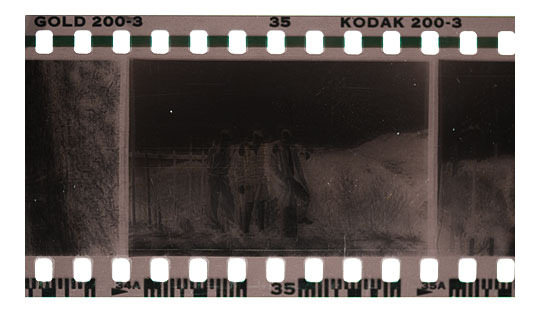
It is useful to examine reality in order to mimic it, so I took the liberty of photographing the old strip of film below. Notice the numbering and bar coding.
2
Lets get started by creating the base for our film, the black edges and camera feed holes. This can be accomplished one of two ways, either by following a series of steps in Photoshop or by creating the filmstrip in a vector program like Illustrator or Flash and then importing that file, sizing it appropriately and then working from there. I will illustrate the all Photoshop method here.
Open a new document with a white background. Mine is 1620×900 at 300ppi because I want to have plenty of room to work and the text will be more manageable at this size. Remember, it is always better to size down that to size up!
Create a new layer by clicking the New Layer icon at the bottom of the layers palette. (*note: if your layers palette isn’t visible, access it by choosing Window>Layers from the main menu). Double click on the name of the layer in the layers palette to rename it "Film".
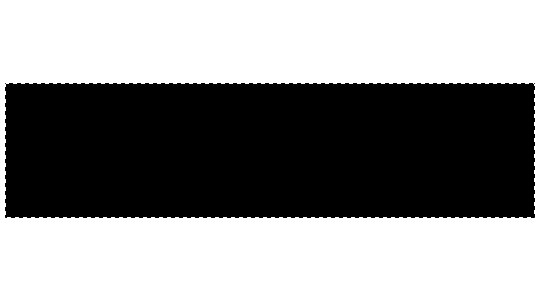
From the Tools palette choose the Rectangular Marquee tool by simply pressing the M key on your keyboard, then on the main stage drag out a nice long rectangle like the one below. Press the D key to reset the foreground and background colors to black and white, then press Option-Delete (PC: Alt-Backspace) to fill the selection with black. Press Command-D (PC: Ctrl-D) to deselect the area.
3
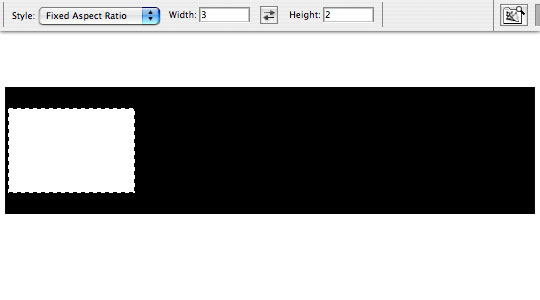
Next we need to delete the area where the photos will be placed. Standard frame format for a 35mm camera is a 2×3 aspect. We can set the Rectangular Marquee tool (which we currently have selected) to constrain itself by choosing Fixed Aspect Ratio from the Style drop down and then by setting the ratio to 3 Wide and 2 High. With the tool set, go ahead and drag out the first opening as shown below and press the Delete (PC: Backspace) key to remove the selection.
(*note: I’ve inset the options bar at the top for reference)
4
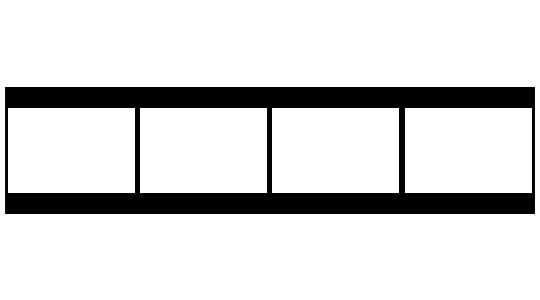
With the selection still active, move the rectangle to the right and remove the remaining frames. Holding down the Shift key while dragging the selection will keep it aligned horizontally or you can move the selection using the arrow keys on your keyboard. (*note: holding the Shift key while using the arrow keys will move the selection 10 pixels at a time.)
When all the sections have been removed press Command-D (PC: Ctrl-D) to deselect.
5
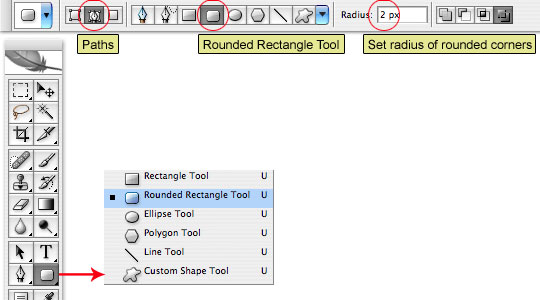
From the Tools bar select the Rounded Rectangle tool from the fly-out-menu by clicking and holding on the Rectangle tool icon in the Tools bar, set the mode to Paths and the corner radius to an appropriate size (for my example a corner radius of 6 pixels is perfect, but if you are building a larger file you may have to experiment a little to find the right size. Leave a little more room at the edge of the film than between the hole and the photo area so you will have room to add numbers in the outer margin later.
6
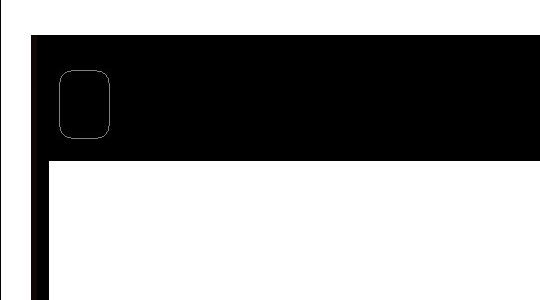
Zoom in on the top left corner of your film by pressing Command-+ (PC: Ctrl-+). If the corner isn’t centered when you zoom, hold the space bar (which will change the cursor to a hand) and click and drag until you can see the corner.
(*note: holding the Space bar with any tool selected will bring up the Hand Tool and will allow you to move the stage around with any other tool selected.)
With the corner enlarged, use the Rounded Rectangle tool which you should still have selected to draw out a path for the first feed hole at the edge of the film. Notice that because we selected Paths from the Rounded Rectangle tool menu, the tool creates a path for our selection rather than a filled pixel shape. This will be important in the next step.
7
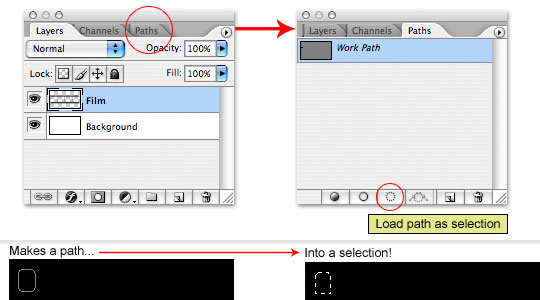
Now that we’ve created a rounded rectangle path, we need to convert the path to a selection so we can delete it from the film. To do this, click on the Paths tab in the layers palette and click the Convert Path to Selection icon at the bottom of the palette then click back to the Layers tab.
8
With the path converted to a selection press Delete (PC: Backspace) to delete the area, then use the arrow keys like we did earlier to move the selection to the right (*note: count your keystrokes with the arrow keys to make sure that every hole is an equal distance from the others). When you finish the top of the film, repeat at the bottom.

9
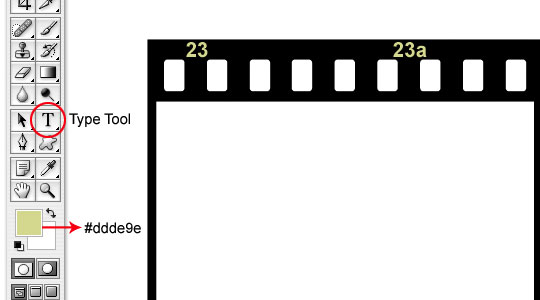
Grab the text tool from the Tools bar or by pressing the T key, set the foreground color to #ddde9e by clicking on the foreground swatch at the bottom of the Tools palette and type in numbering along the top of the film. Each picture should have it’s own number, and often times there exists a middle number followed by a lowercase "a" incase the film was loaded or wound incorrectly as an alternate identifier. (*note: number spacing isn’t always consistent with the hole pattern, so add a little variety for realism)
When you’re finished, double click on the layer name in the layers palette and call this layer Top Numbers.
10
Add a new layer below the Top Numbers layer by holding down the Command key (PC: Ctrl) while clicking on the new layer icon at the bottom of the layers palette and name the layer Stripe.
Switch to the Rectangular Marquee tool by pressing the M key and change the Style back to Normal in the menu at the top. Drag a long rectangle across the holes at the top of the film to create the stripe we saw on the reference image in Step 1 and fill the rectangle with the foreground color we just set by pressing Command-Delete (PC: Ctrl-Backspace).
11
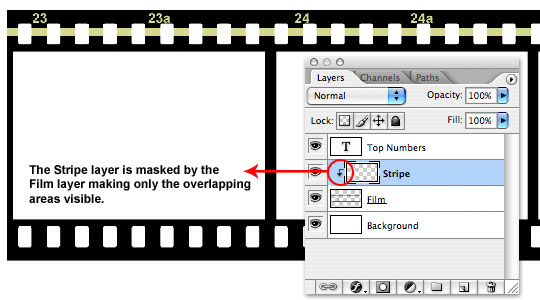
Deselect by pressing Command-D (PC: Ctrl-D), right click on the layer in the layers palette and choose Create Clipping Mask from the menu OR hold down the Option (PC: Alt) key and place your mouse pointer on the line between this new layer and the Film layer until you see the cursor change to two overlapping circles then click to create the clipping mask. See inset below.
(*note: A clipping mask is used to mask one layer to the layer below, essentially hiding all the areas that don’t overlap. Clipping masks can be added on top of each other to mask multiple layers to a single layer.)
12
Change the opacity of the Stripe layer to 35% and click back to the Top Numbers layer.
Duplicate the Top Numbers layer by pressing Command-J (PC: Ctrl-J) name the new layer Bottom Numbers.
Switch to the Move tool by pressing the V key, then by clicking and dragging OR by using the arrow keys, move the numbers to the bottom of the film. I think I like the look of the the number and alternates better on the bottom, but I’d still like to use the top numbers (more like the reference in Step 1) so I’m going to double click on the layer icon for the Top Numbers layer (which will be a big T because the layer is text), this will highlight the text on the stage and I can go ahead and make my adjustments. Lets also drop the opacity of both text layers to 85% to make the lettering seem a touch transparent.
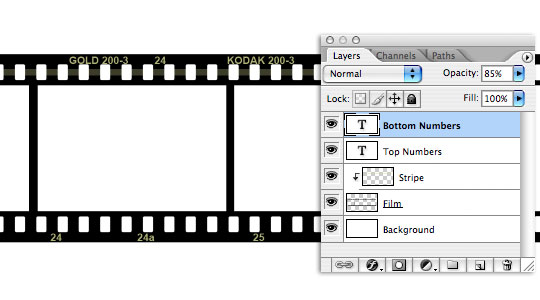
13
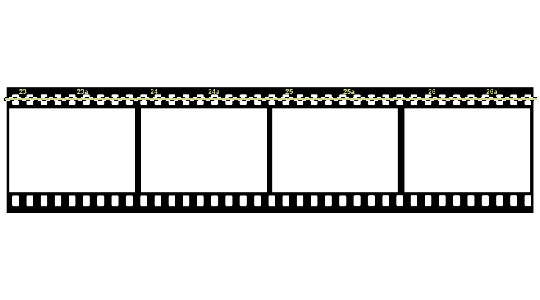
I’m not a big fan of the barcode look at the bottom of the example film, but I have noticed that some film companies put little arrows in the margin, so I’m going to ad a few of those to the bottom row randomly between the numbers. I created a new layer called Arrows and with the Polygonal Lasso tool (which can be found under the Lasso tool in the Tools bar) I drew small arrow shapes and filled them with the foreground color.
(*note: an easy way to do this is to draw and fill one arrow then duplicate the layer by pressing Command-J (PC: Ctrl-J) and moving the new arrow on it’s own layer over with the arrow keys. You can then select all those layers by clicking on the top one, holding the Shift key and clicking on the bottom one and by pressing Command-E (PC: Ctrl-E) merge all those selected layers into one layer.)

14
Click back to the Background layer (because now we are ready to insert our photos and we need them to be imported beneath the Film layer).
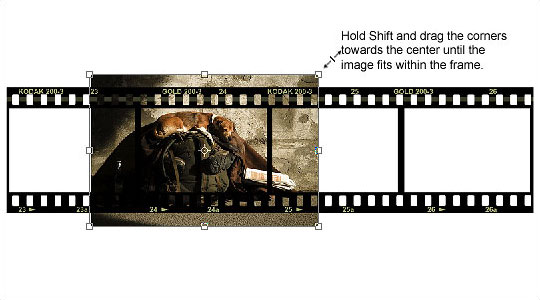
Open a photo that you would like to put inside one of the photo areas and with the Move tool selected by pressing V, click and drag the image into your Film file. This will create a new layer called Layer 1 directly above the Background layer.
It’s likely that your photo will be too large initially to fit inside the little box, so press Command-T (PC: Ctrl-T) to invoke the Free Transform tool OR click Edit>Free Transform from the main menu. While holding Shift to constrain the proportions, click and drag the corners of the transform box in until the photo fits within the space correctly. Because we constrained our photo areas to a 2×3 aspect ratio, most photos will fit in the window perfectly. You may want to leave the photo just a touch larger than the hole just to allow a little wiggle room. When it’s sized and positioned correctly press Return (PC: Enter) to commit the transform.
15
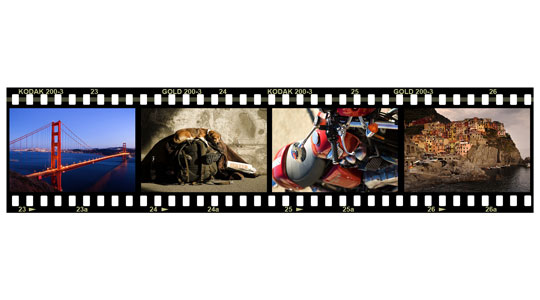
Add more photos as desired exactly the same way.
UPDATE: I didn’t get into photography until digital came along so I didn’t know about this, but it’s been brought to my attention that Kodak Gold 200 film is a negative film and thus would not be displaying positive images. To be product correct you may want to use text such as Kodak Ektachrome or Kodachrome on your film, both are slide films that produce a positive on the film rather than a negative. Thanks to papagmp for pointing that out!
16
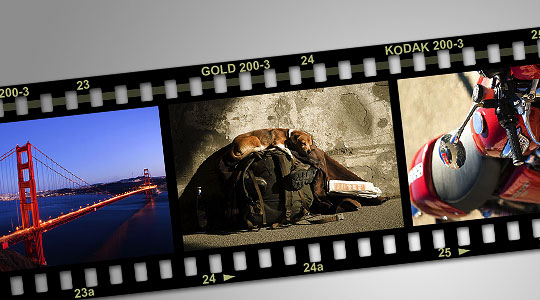
Style as needed! Nice work.